Setup your mail box in Outlook or other mail clients ( ipad / iphone / Android / windows mobile). You need to obtain the following information: before configuring your mail box.
- Your full email address.
- The type of email account: POP3, IMAP or HTTP.
- Your user name.
- Your password.
- The SMTP server name or address. Note. ( mail.yourdomainname.com) – for both POP and IMAP accounts
- The POP3 server name or address. Note. ( mail.yourdomainname.com) – for both POP and IMAP accounts
- Is Secure Password Authentication (SPA) required?
- The port number that is used for SMTP. (Most ISPs use port 25.)
- Is encryption (SSL is most common) required for the port?
- The port number that is used for POP3. (Most ISPs use port 110.)
- Do you require encryption (SSL is most common) for the port?
- Does the outgoing email server (SMTP) require authentication?
- If so, do you use my normal email name and password?
1.Open Outlook 2010.
2. Click File, then Add Account. See Figure 1 below.
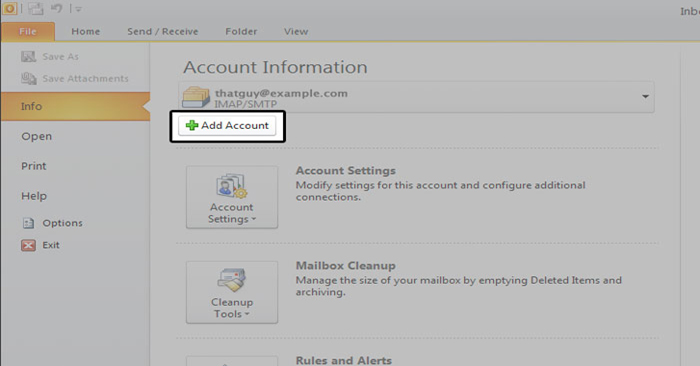
Figure 1: Click the "+Add Account" button to begin.
Enter your full email address and password. Outlook should automatically configure your account for you. If not, proceed to the next section.
Manually configure Outlook 2010
1.Open Outlook 2010.
2.Click File, then Add Account. See Figure 1 below.
Figure 1: Click the "+Add Account" button to begin.
3.Next, select Manually configure server settings or additional server types, then click Next. See Figure 2 below.

Figure 2: This will allow you to enter your account information.
4.In this screen, choose Internet E-mail, then click Next. Figure 3 below illustrates this window.

Figure 3: Be sure to select "Internet E-mail" then click the "Next" button.
5.This window is where you enter your email information, see Figure 4 below.

Figure 4: Enter your email account information in this window.
- Enter Your Name as you want it to appear.
- Enter your full email address username@example.com in the Email address: field.
- Select POP3 or IMAP.
- Enter your access domain( mail.yourdomain.com) in the Incoming mail (POP3, IMAP) server: field.
- Enter your access domain (mail.yourdomain.com)in the Outgoing mail (SMTP) server: field.
- Enter your full email address, username@example.com, in the User Name field.
- Enter your email password in the Password: field.
6.Perform the following steps:
Click on More Settings... see Figure 5 for the location of this button.

Figure 5: This will open a new window.
Click on the Outgoing Server tab. Check My outgoing server (SMTP) Requires Authentication. Make sure Use same setting as my incoming mail server is also checked. Click on OK. See Figure 6 as reference.

Figure 6: Be sure to confirm these settings.
7.Click the Test Account Settings button and you should see all items with green check marks... Click the Close Button to close the test window.
Click OK to save your settings.
Congratulations. You have finished the setup of your email account. Click Finish to close the setup wizard.
Configure mail box on your ipad , iphone , etc
This article will guide you on how to setup POP email account from iPad.
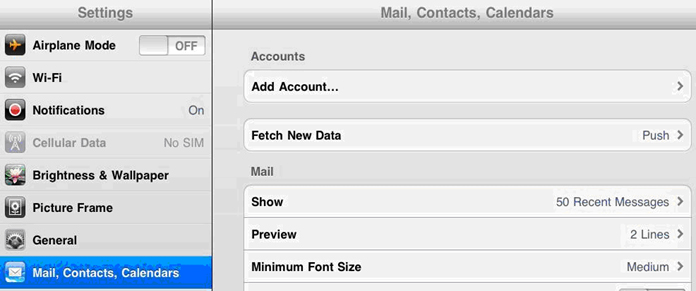
1.If this is the first account you're setting up on the iPad tap Mail. Otherwise, from the Home screen tap Settings -> Mail -> Accounts -> Add Account.
2.Choose your email account type. For setting up email to work with your domain email address tap Other.
3.Enter your Name , Address(email address), Email Password ,and description.
4.Tap SAVE POP and IMAP will be show on top on bar. You are allow to choose POP3 or IMAP when setup domain email into iPad.
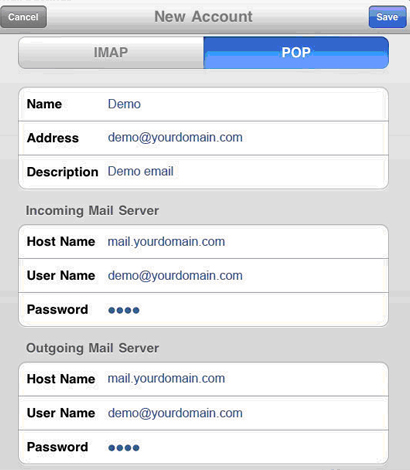
5.tap POP so it will highlighted.
6.Fill in all as below POP Info Name : Email name , Address (full email address), and Description.
Incoming Mail server : host name: mail.yourdomain.com, Username: (full email address) Password (email password) > click done/verify.

7.If system showing message as Cannot verify server indentity, tap Details and tap Accept.


8.After accept, go back HOME go to -> Settings -> Mail, Contacts, Calendars -> Tap (email account you setup earlier) and check POP and SMTP (outgoing mail server) setting.

9.tap SMTP mail.yourdomain.com > tap mail.yourdomain.com On.

10.Check your SMTP SSL: off (enable it if your webmail come with SSL) , Authentication: Password, Server Port number : 587 (if you choose SSL you will need to set Server Port as 465 for SMTP) Once confirm tap DONE.

11.Go back to email setting page , click advance to check your POP setting, SSL: off, Authentication: Password , Server Port : 110, if you enable SSL you are require set it as : 995.
12.tap Done/Verify, Your iPad is now configure to send and receive your domain email.
Configure mail box on your Android phone
The following article explains how to setup your Android to download email from your Hosting.com account via IMAP. Android software version 2.2:
1.From the Home Screen or Application Menu, click the Mail icon..

2.If you DO NOT already have a POP, IMAP or Exchange email account setup on your phone, skip to step 5, other wise you should see a screen like the one below. From this screen, click the Menu Button on your phone to bring up additional setting options.
3.Click More.

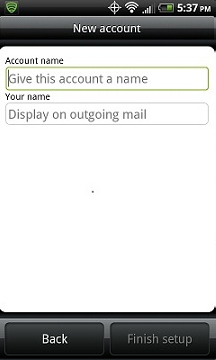
4.Click New account.

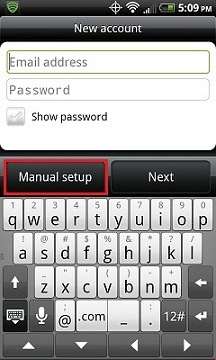
5.Select Other (POP3/IMAP).

6.Choose Manual Setup..
7.Fill out the Incoming settings screen like the example below with your specific credentials then click Next.

8.Fill out the Outgoing server settings screen like the example below with your specific credentials then clickNext.

9.Choose what to call this email account on the following screen then click Finish Setup.